Quickstart
Introduction
With Spintly Cloud you can easily integrate lot of access control functionality in your appplication.
If you're just getting started with Spintly, you can contact our support team and get you onboarded to the platform
If you're not sure what you want to build with Spintly, check out our sample use cases for inspiration, and we'll walk you through the setup step-by-step!
Step 1: Create an account
Contact Spintly support team to create an account
Step 2: Select type of integration
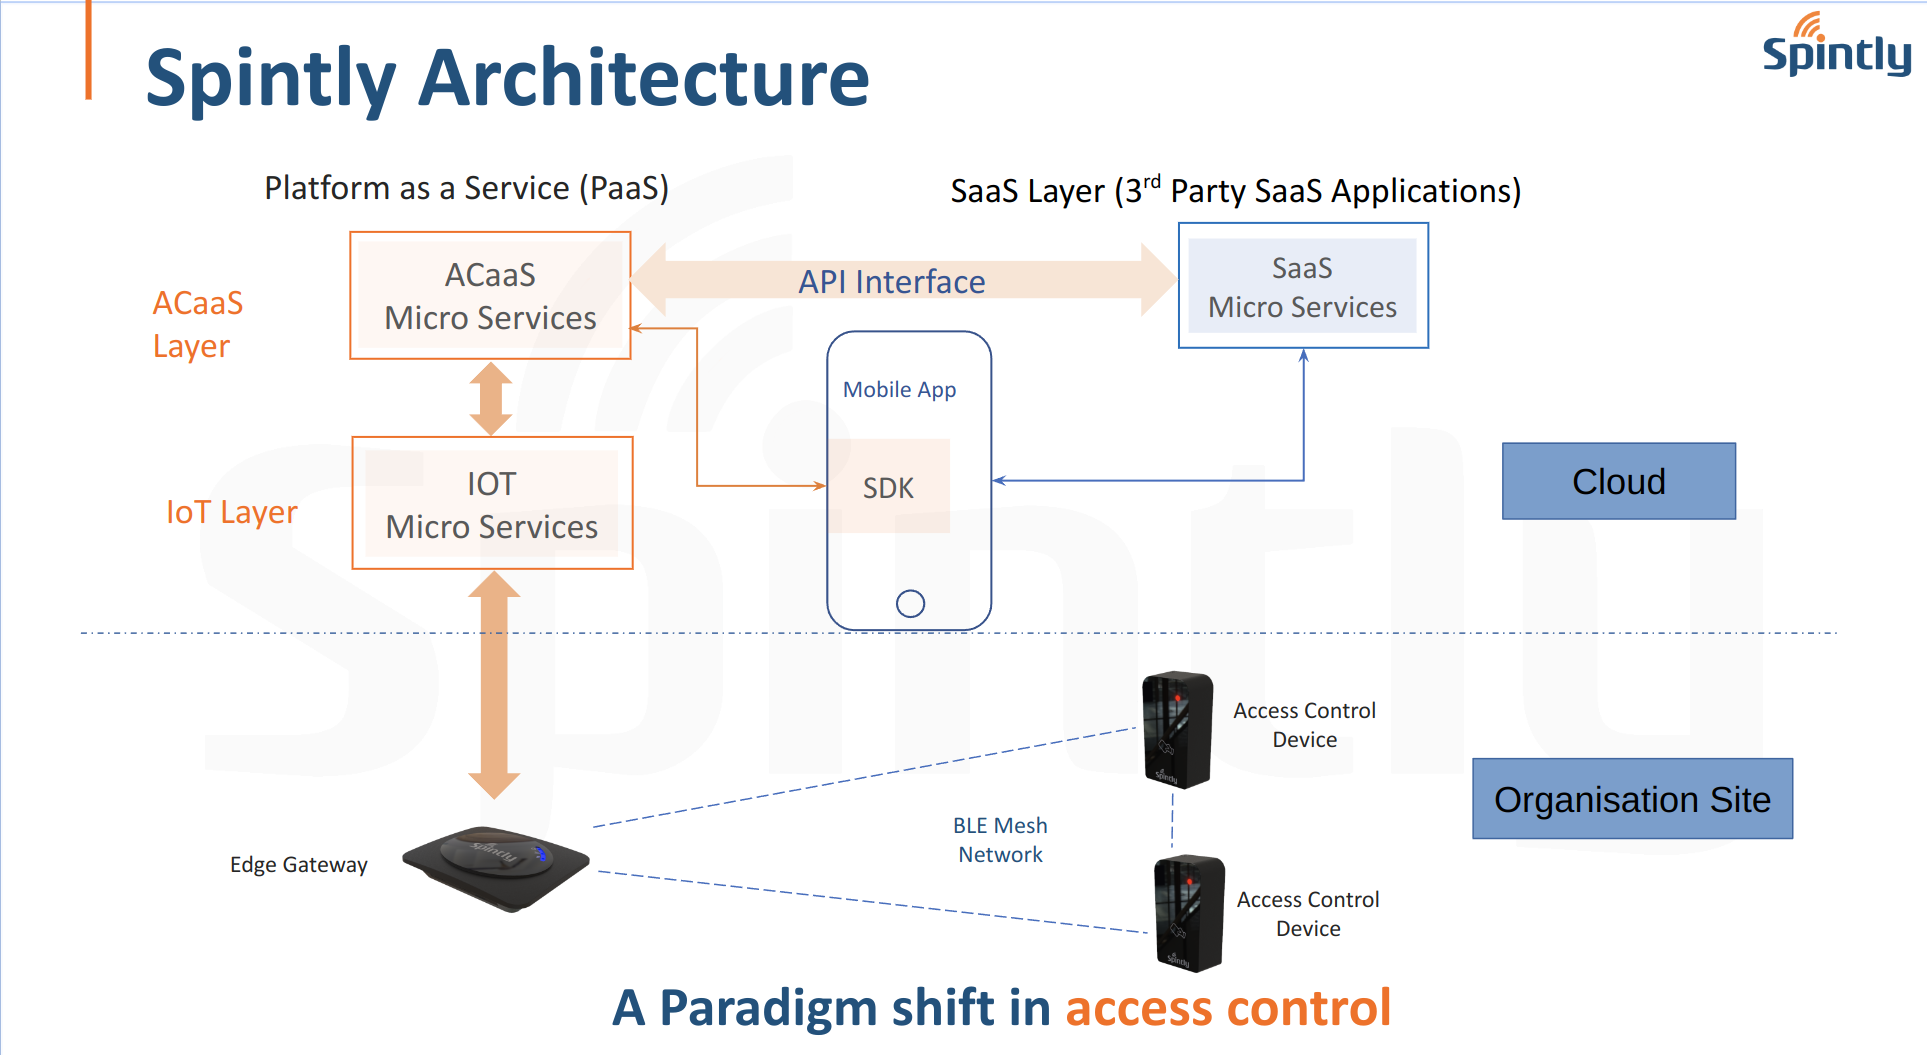
Spintly being a Cloud platform offers integration to its different microservices, To chosse what integration suits you best please go to integration sections

Step 3: Signing of NDA
Before the integration docs are shared Spintly and the client needs to sign a NDA
Step 4: Keys for backend and mobile
Before you start, make sure you get the required keys needed for the mobile as well as backend
Step 5: Sample App and backend
To make your life easier, Spintly provides its own sample app which showcases how to sue the sdk in the app and sample Backend which showcases how to use the backend apis
Step 5: WorkFlow Agreement
Once you have a hang of how the App and backend works, the next important step is to come up with a workflow between the two applications, this step will result in smooth integration
Step 5: Testing
Once the sdk and the apis are integrated with client app and backend, next step is to test integration at a test organisation
Step 5: Deployment
Once its tested and approved by spintly, next step is to deploy the solution and make your customer journey easily
Next steps
Learn tutorial before you start integration it always better to know what spintly is really is and what seravices it provides. For a full hands-on tour of Spintly, check out our 30-Minute Spintly Basics Tutorial.
- Spintly Website Tutorial
- Spintly Mobile Application Tutorial
- Spintly Sample app and Spintly SDK integration Tutorial
- Spintly Sample Backend and Spintly Api integration Tutorial
The Hasura CLI is a powerful tool that helps you manage your Hasura project and is recommended for the majority of development workflows. It helps track and manage your Hasura Metadata and Migrations and commit them to version control and allows you to quickly move between environments like development and production.
Database operations We omitted the CLI steps in this guide for the sake of simplicity and brevity, but in a typical new project, you would always include the CLI setup steps.
Every developer working with Spintly backend or apis should have the Spintly sample Website access for its. You can quickly get up and running with the credentials shared with you by the spintly suppot team